Easiest way to setup and be consent mode v2 ready is by using Google recommended consent manegement partners (most of them offer free options for small business websites built on WordPress).
Below I’m going to show you various methods for ensuring your WordPress website is ready for the latest requirements, and adheres to new privacy control policies. Do keep in mind that each juristiction a website serves may require different settings. This means, it is up to you to familiarize yourself with your own specific requirements.
Video Tutorial Showing How-to Setup Consent Mode V2 on WordPress for Free
What is Consent Mode?
Consent Mode is a feature provided by Google’s advertising services, particularly for Google Ads, Google Analytics and Google Tag Manager scripts. Consent mode lets you communicate your users’ cookie (or app identifier) consent status to Google. Tags adjust their behaviour and respect users’ choices.
What is Consent Mode v2?
As a part of Google’s ongoing commitment to a privacy-centric digital advertising ecosystem, Google is strengthening the enforcement of their EU user consent policy.
you must ensure that certain disclosures are given to, and consents obtained from, end users in the European Economic Area along with the UK. If you fail to comply with this policy, we may limit or suspend your use of the Google product and/or terminate your agreement.
You must obtain end users’ legally valid consent to:
- the use of cookies or other local storage where legally required; and
- the collection, sharing, and use of personal data for personalization of ads.
When seeking consent you must:
- retain records of consent given by end users; and
- provide end users with clear instructions for revocation of consent.
Latest requirements for using Google products now requires websites (or Apps) comply with often complex to understand regulations such as the General Data Protection Regulation (GDPR) in the European Union and the California Consumer Privacy Act (CCPA) in the United States (consent mode v2 has two additional tags called ad_user_data, and ad_personalization).
How-to Do You Implement Strong Privacy Policies on Your WordPress Site?
Ensure your privacy policy is updated and clearly defines its cookie usage policies. Furthermore, your privacy policy should include options for website visitors to set their cookie preferences (and in the case of European Economic Area along with the UK) provide end users with clear instructions for revocation of consent.
How-to Setup Consent Mode V2 on WordPress Site for Free
There are countless freely available WordPress consent mode plugins as well as Google Consent Mode Partners that you can use to setup cookie banner notices that by default disable tracking cookies. These WordPress plugins then help you to automatically set all the below Consent Types.
- ad_storage (granted | denied) this tag enables storage, such as cookies, related to advertising.
- ad_user_data (granted | denied) this tag sets consent for sending user data related to advertising to Google (default state in Consent mode v2 must now be set to denied, but granted only when user gives consent)
- ad_personalization (granted | denied) this tag sets consent for personalized advertising (default state in Consent mode v2 must now be set to denied, but granted only when user gives consent)
- analytics_storage (granted | denied) this tag enables storage, such as cookies, related to analytics (for example, visit duration).
- functionality_storage (granted | denied) this tag enables storage that supports the functionality of the website or app such as language settings.
- personalization_storage (granted | denied) this tag enables storage related to personalization such as video recommendations.
- security_storage (granted | denied) this tag enables storage related to security such as authentication functionality, fraud prevention, and other user protection
3 Steps for Ensuring Correct Setup
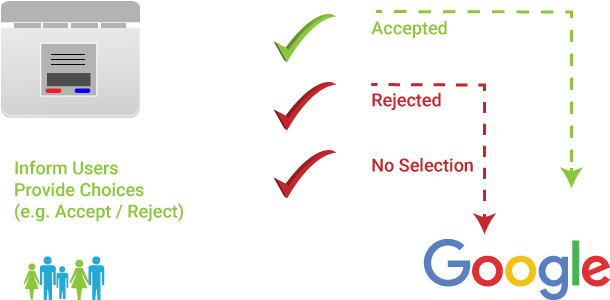
- Obtain user consent
- Send user choice to Google
- Ensure that Google tags comply with consent choice
1. Obtain User Consent
Simply first setup banner or notices informing the website visitor that you are using cookies and you are (or third-party services such as Google) is receiving signals on/through your website. You accomplish this using WordPress plugins that support consent mode v2 compliance (how you word the cookie policies or tracking information is totally up to you (make is short and informative)).
2. Send User Choice to Google
There are millions of different ways you can send user choices to Google servers. I recommend you use the set up consent mode instructions here (RankYa recommendeds using advanced setup options to at least track cookieless pings).
3. Ensure Google Tags Comply with Consent Choice
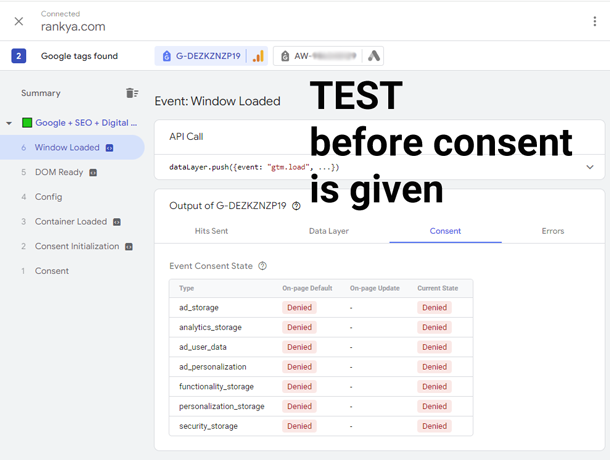
Since you may already be using Google Ads, Google Analytics, Google Tag Manager, easiest way to test your consent mode v2 settings is by using Tag Assistant (or Tag Assistant Companion Chrome extension if not using Google products).
When testing to see if your consent mode version 2 is setup correctly, initial state should be set to denied (before consent is given).
 Once consent is given, your WordPress site should update the tag signal state to “granted” status so that Google can start receiving signals.
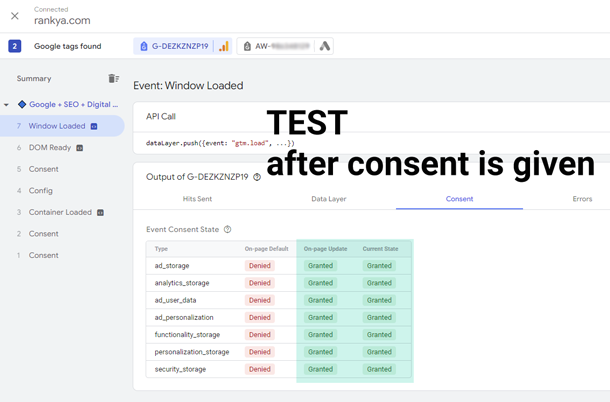 Depending on where you are on the planet, and, the target audience visiting your website you can tweak your consent mode v2 accordingly. Best option to learn more is by visiting Google help section (also consider reading through other blog posts by RankYa related to Consent Mode).
How Do You Find Which Cookies and Scripts Are Used on Your WordPress Site?
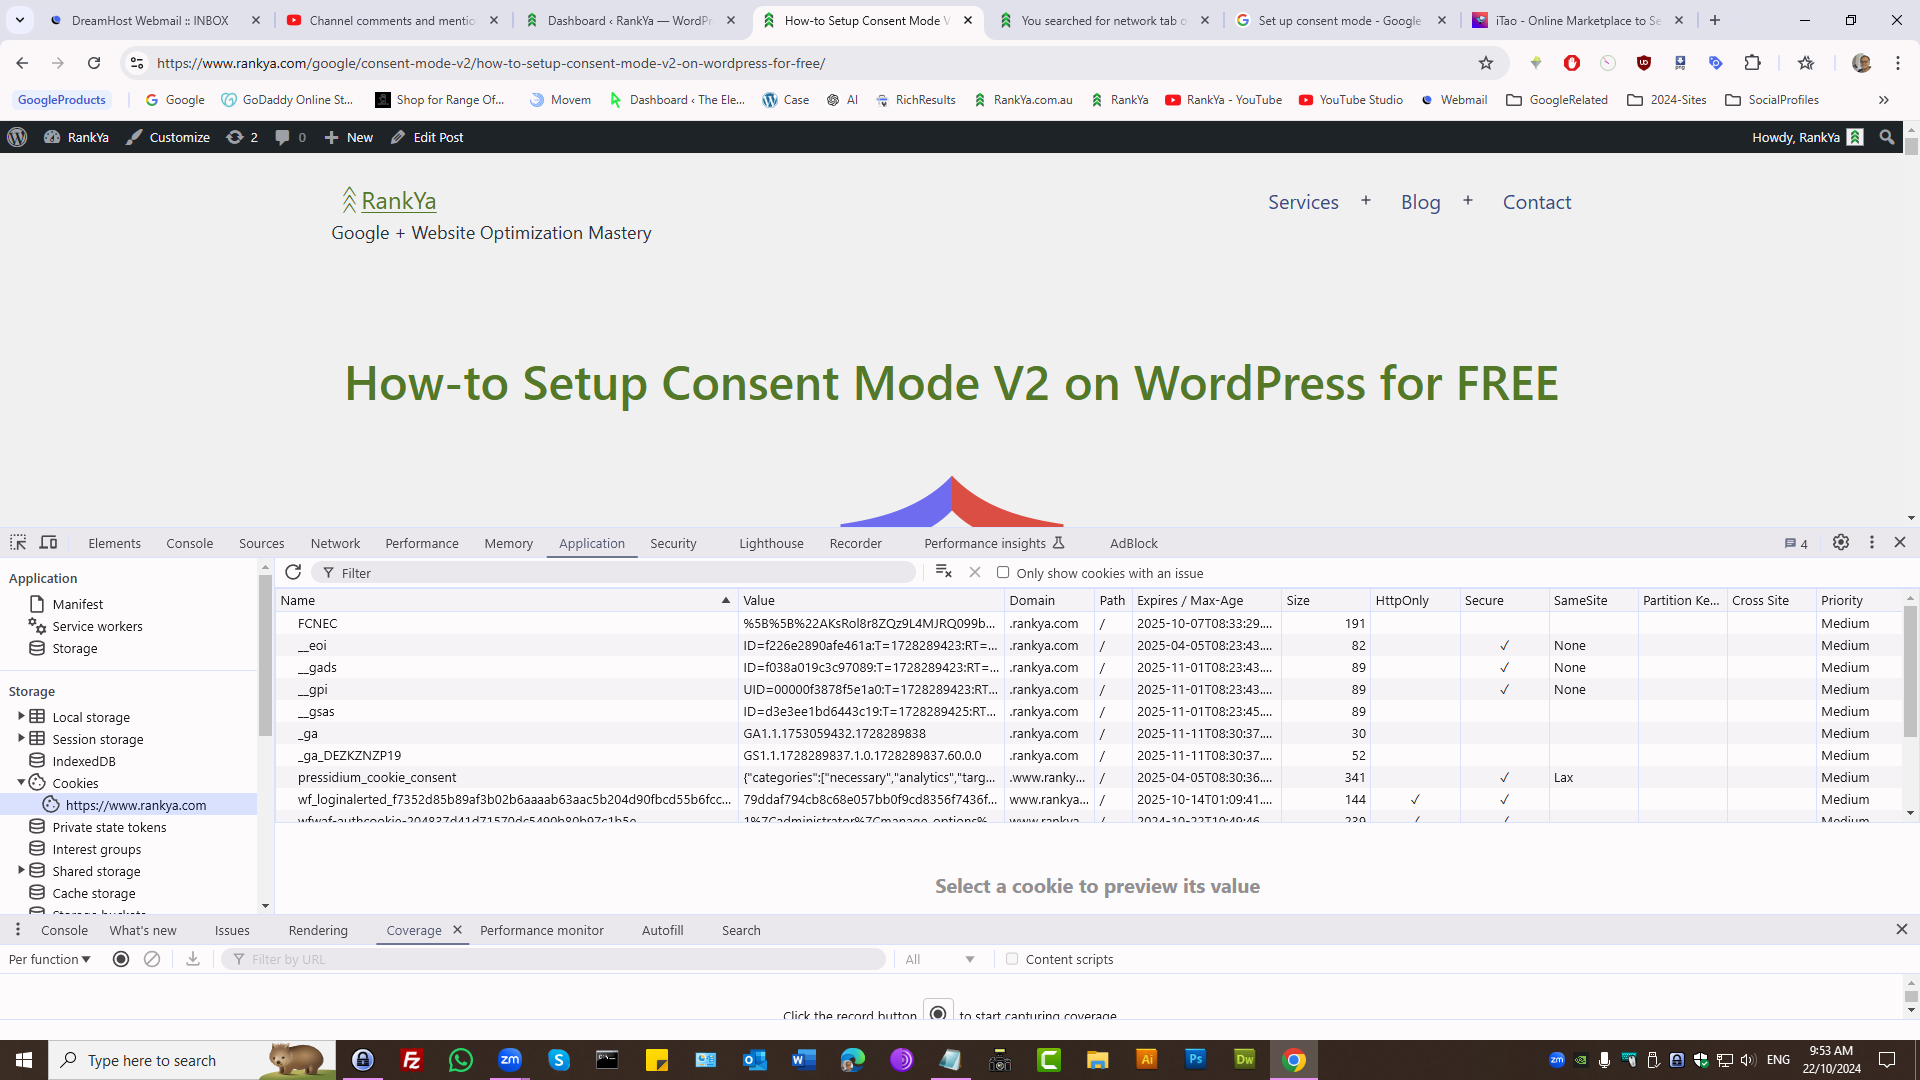
You can use many free tools online to scan your own website to identify which Cookies are set. Or, you can use web dev toolbar by pressing F12 function key on your keyboard. Then, analyze Application Tab.
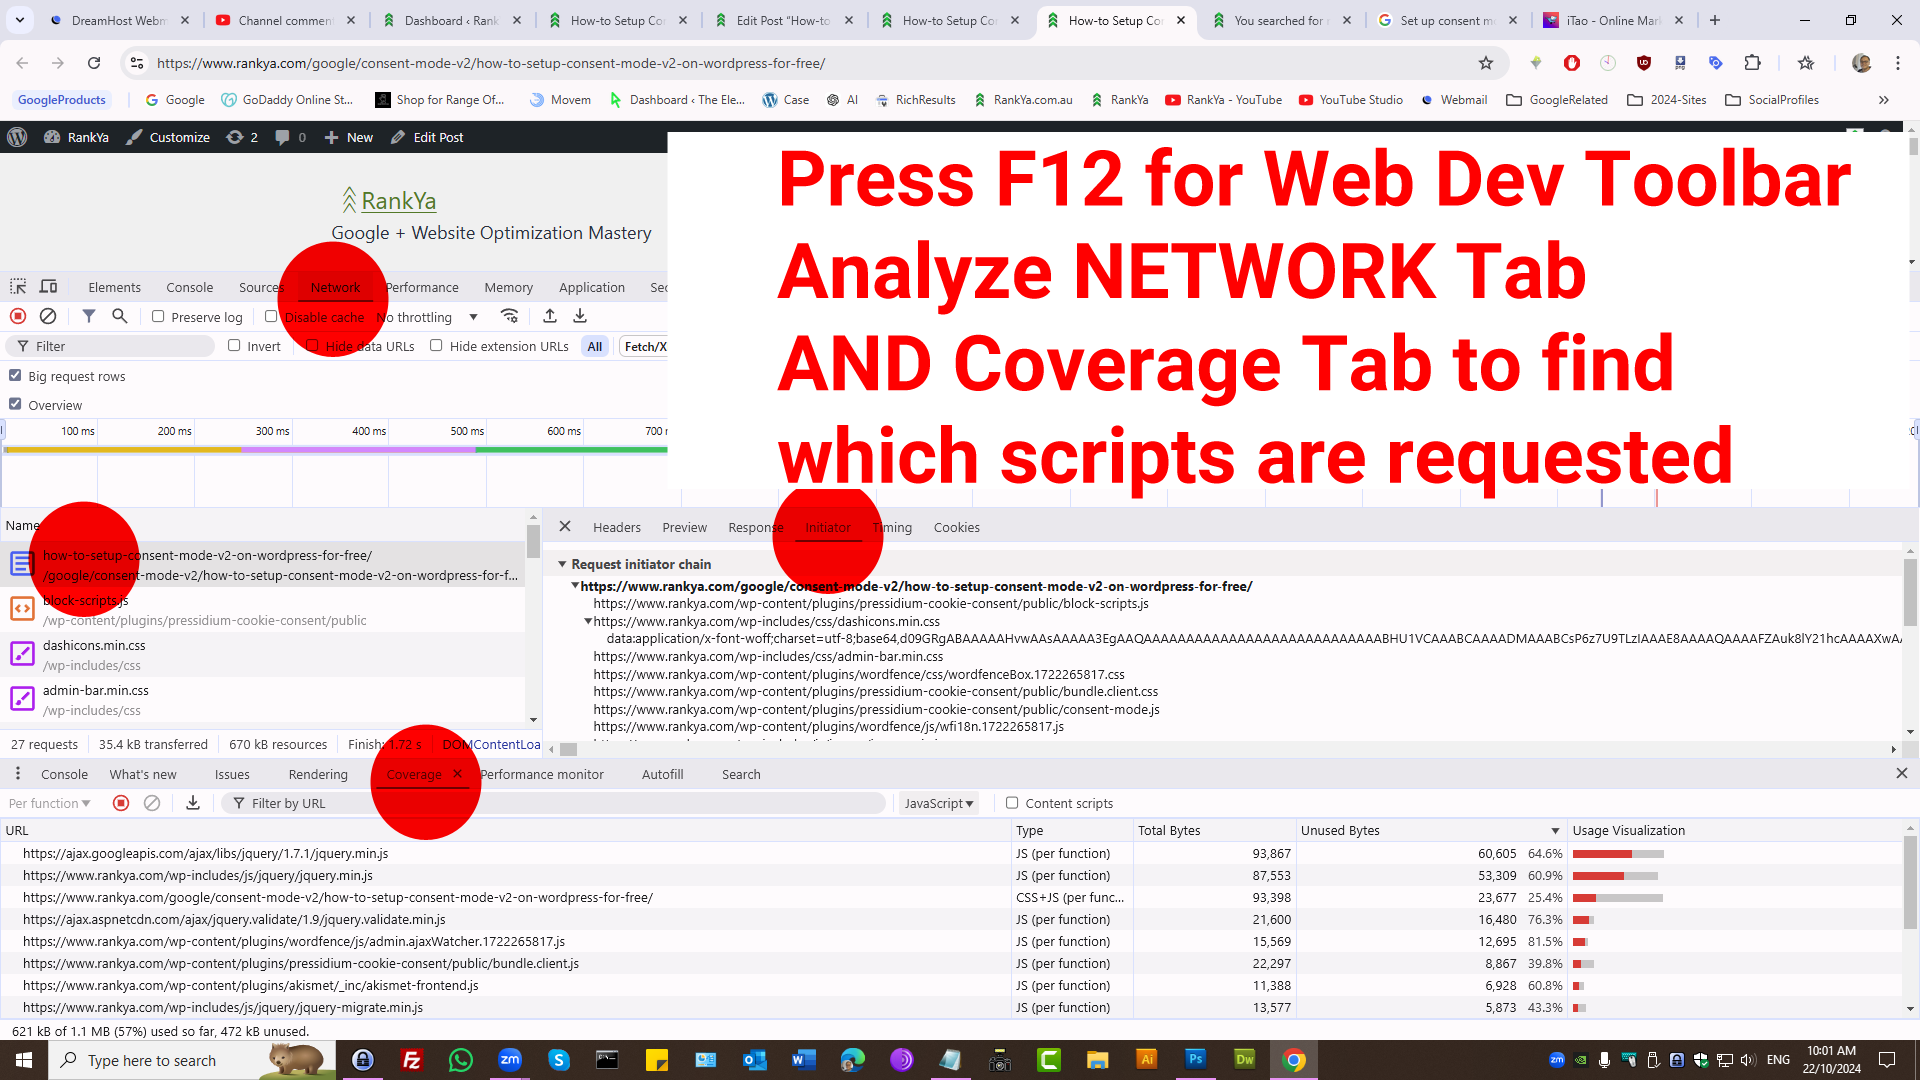
You can use web dev toolbar by pressing F12 function key on your keyboard. Then, Analyze ‘Network Tab’ and ‘Coverage Tab’ reports to identify which JavaScript files are requested.

Thank you for the latest video and tutorial on Consent V2 and the Pressidium cookie plugin https://www.youtube.com/watch?v=y618zHEJ8sQ and I just had a question again about the cookies categories and the cookies themselves. How to set each cookie into each appropriate category? Also you have blocked scripts all set under the category Targeting is there a reason for that? Also you have a blocked script source format like this ^(?:https?”:)?\/\/(?:www\.)?google-analytics\.com\/(.*) in your first video on the topic and then in this latest video you have it like this ^(?:https?”:)?\/\/(?:www\.)?google-analytics\.com which one should someone use to be most accurate? Thank you for the explanations.
Hi James, first don’t worry about my own setup it is confusing even for me (it is due to testing and making these videos I tend to forget to delete some settings after the video is published 🙂 all you have to do is first check the < script tag for your own setup (for example: < script googletagmanager.com) then you would simply use that in block scripts as the URL you want to block.
As for the categories and the cookies themselves, once again for my own setup and blocking needs using Pressidium cookie consent plugin, I’ve found it easier to group them so that I could just use
script type=”text/plain” data-cookiecategory=”targeting”
At this moment I haven’t tested >>> script type=”text/plain” data-cookiecategory=”targeting” data-cookiecategory=”analytics” <<< on the same < script tag, to see if the Pressidium cookie consent plugin would delete each category I've inserted to the script tag, so thus, from a usability point of view and simplicity of maintenance, I've decided to use CSS to remove other categories from displaying on the frontend, and only display 1 category.
/*hello rankya grouped blocked scripts so you need not display these on popup modaladded these CSS rules inside
wp-content/plugins/pressidium-cookie-consent/public/bundle.client.css
*/
#s-bl .c-bl.b-ex:nth-of-type(4),
#s-bl .c-bl.b-ex:nth-of-type(5){
display:none!important
}
In my case, this works okay because I am using Google Analytics + Google Ads for personalized advertising purposes. Furthermore, when we think from a user-point-of-view, then, it makes better sense to request consent anyway (because it is unlikely that someone is going to accept targeting while denying functional cookies for example). So, I’ve decided to present just 1 “targeting cookies” and if the visitor accepts, then, signal is sent, if not, no harm done.
How to set each cookie into each appropriate category? This will be tricky for most WordPress site owners, to make the process easy “ask yourself, what is the google tag used for? Analytics ONLY? Then it is analytics only. If analytics with Google Ads remarketing, then, it is “Targeting”
Don’t be caught up with perfection because ideally it is about consent. To be bit cheaky, you can use (free cookie scanners (or even sign up for Google Certified Partners for them to identify each cookie and appropriate category, then, you can come back and use Pressidium cookie consent plugin. Thus adjust the settings accordingly)). I hope this clarifies.